
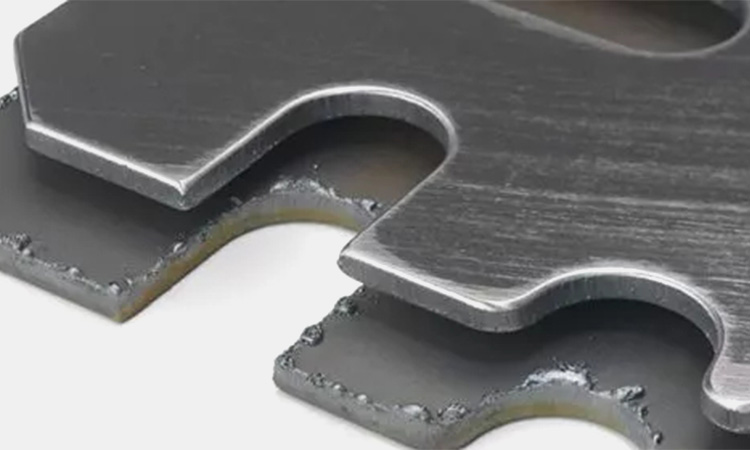
Everyone knows the frustration of pulling a finished plate off the conveyor, only to spot ripple lines, deep scratches, or heat warping. In high-volume deburring and graining, these surface defects mean rejected orders, failed powder coating, and hours of painful manual rework.
When chatter marks appear, most shop floors immediately toss the abrasive belt. Yet, in over 70% of cases, the belt is just the scapegoat. The real culprit usually hides in machine vibration, worn roller bearings, or mismatched feed settings.
In this guide, we break down a practical, step-by-step troubleshooting sequence to help you find the root cause, fix defect patterns, and lock in consistent surface quality on your wide belt sander.
1. Common Sheet Metal Grinding Defects
Don’t start wrenching on your machine or messing with air valves just yet. Take a close look at the defect under a flashlight, and match what you see in the chart below:
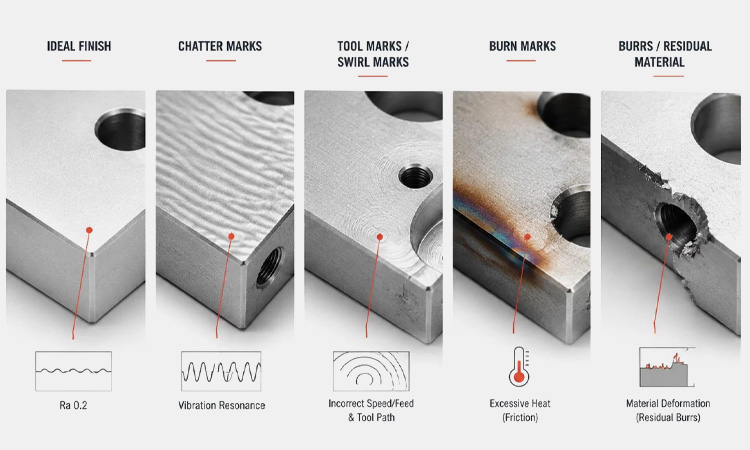
| What You See on the Metal | Most Likely Causes | Immediate Floor Check | |
| Chatter Marks | Repetitive, evenly spaced transverse wave marks across the feed direction | Contact roller runout, dynamic imbalance, bearing play, or joint splice shock | Roller bearings, contact drum concentricity, belt joint thickness |
| Scratches | Continuous straight grooves running parallel to belt travel | Swarf buildup, fractured abrasive grains embedded in belt, contaminated conveyor | Clean air blowers, vacuum hold-down bed, belt loading |
| Uneven Grinding | Inconsistent stock removal across part width; beveling at edges | Contact roller misalignment, uneven pinch roller pressure, warped conveyor belt | Parallelism between roller and bed, pneumatic hold-down pressure |
| Grinding Burn & Warping | Straw-to-blue oxidation discoloration, localized sheet distortion | Excessive downforce, glazed dull abrasive, high friction dry grinding | Depth of cut, abrasive grain sharpness, feed speed vs. belt speed |
| Joint Marks | Single transverse imprint repeating precisely at intervals of the belt length | Stiff belt splice, excessive splice thickness, blunt butt-joint tape | Abrasive joint type (overlap vs. sinusoidal tape), tension pressure |
| Wavy / Stepped Surface | Irregular washboard profile or height steps across the plate | Conveyor belt slippage, hesitation in feed drive, insufficient vacuum hold-down | Conveyor belt friction, drive motor gearbox backlash, hold-down rollers |
| Abrasive Belt Loading | Clogged grit pockets filled with smeared aluminum or stainless swarf | Incorrect abrasive coating, lack of antistatic backing, insufficient dust extraction | Abrasive type (open vs. closed coat), dust exhaust air velocity |
2. Why Is Your Wide Belt Leaving Chatter Marks?
Chatter marks are the most frustrating defect in wide belt metal finishing because they rarely stem from a single, obvious flaw. Instead, they are the visual footprint of harmonic vibration transmitted directly into the cutting zone.
To eliminate chatter permanently, you must stop guessing and start measuring the pattern on your sheet metal.
How to Read the Defect Pattern
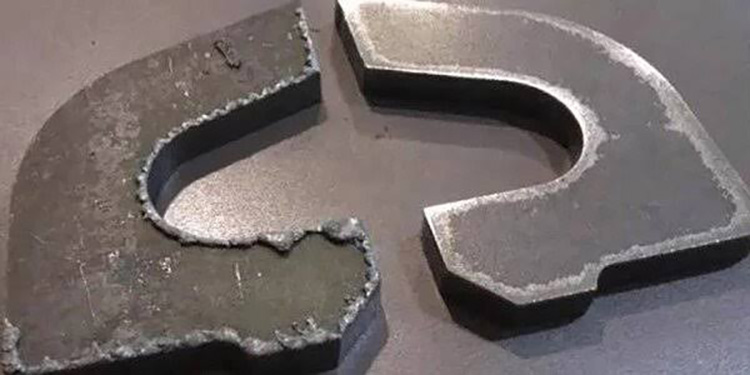
Before wrenching on guards or blaming the belt supplier, grab a steel ruler and measure the gap between the ripple crests:
- Tight ripples (2–10 mm apart): Points straight to high-speed spin. Check for worn spindle bearings, motor rotor vibration, or an out-of-round contact drum.
- Wide waves (15–50+ mm apart): The feed system is stumbling. Look for a slipping conveyor belt, drive chain surging, or a worn reduction gearbox.
- A single line spaced one belt-length apart: A thick, stiff belt seam is slapping the sheet every rotation.
- Gouged ends only (Snipe): If ripples cluster only on the first or last 50 mm, pinch rollers are misadjusted or striking the edge as parts enter.
Let the spacing tell you where the vibration lives before tearing anything apart.
4 Machine Parts to Check for Wide Belt Chatter
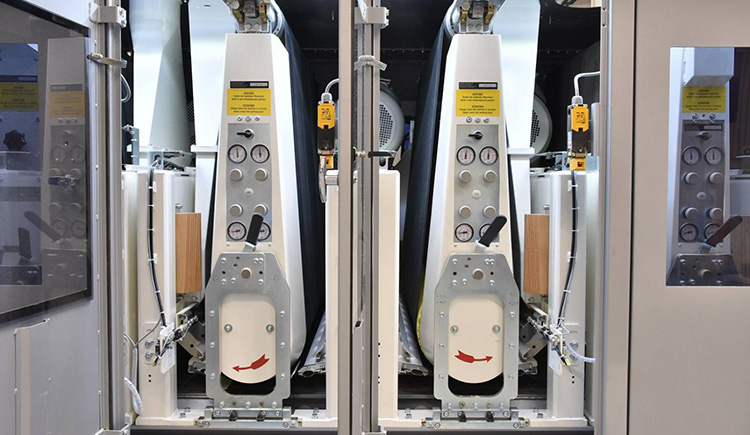
Once you know the ripple pitch, focus on these four mechanical assemblies where vibration usually hides:
- The Contact Roller: This drum acts as the solid anvil behind your cut. Put a dial indicator on it—a runout over 0.02 mm will ripple soft stainless or aluminum plate instantly. Hardened, cracked rubber also bounces instead of absorbing shock.
- The Abrasive Belt & Splice: At 30 m/s, a stiff, thick lap seam hammers the sheet on every single turn. Run flush sine-wave taped joints instead, and keep pneumatic tension firm at 3.5 to 5.0 bar so the belt tracks flat.
- Spindle Bearings & Frame Flex: Heavy grinding puts serious downforce on the machine. Pitted spindle bearings rumble at high RPM, while loose drive belts pass motor vibration straight down to the grinding head.
- Feed Belt Slip & Sheet Flutter: A defect-free surface needs parts locked firmly in place. Metal dust makes conveyors slick, letting parts micro-stall under heavy cuts. Keep feed belts clean, tighten pinch rollers, and use a vacuum bed to pull thin sheets flat and prevent thermal warping.
3. How to Troubleshoot Wide Belt Grinding Defects Step by Step
When parts come out with ripples or scratches, the worst move is blindly turning knobs, cranking up cylinder pressure, and swapping belts all at once. Changing everything at the same time only hides the real issue under new defects.
Take a breath, grab your flashlight, and follow this steady 6-step shop-floor checklist:
- Step 1: Check the Lines Under Low Light. Tilt an LED light at 15–30° across the plate. Do the ripples run across the whole width, angle off to the side, or cluster only on the front edge? Let the visual pattern guide your next move.
- Step 2: Feel the Belt and Check Tension. Slide your fingers across the belt seam. If you feel a noticeable bump, it will hammer every part it touches. Check between the grit for packed metal dust or glazed tips, and ensure air tension sits between 3.5 and 5.0 bar steadily.
- Step 3: Dial-Indicate the Contact Drum. Set a dial indicator on the bare rubber roller and turn it by hand. Radial wobble must stay under 0.02 mm (0.0008 in). Grasp the shaft firmly to check for loose bearing play, and ensure the rubber hasn’t baked rock-hard.
- Step 4: Stop the Sheet from Fluttering. Wipe slick metal dust off the conveyor bed. Set pinch rollers so they grip firmly without bending thin sheet edges into the table gap, and verify your vacuum bed pulls hard enough to hold small laser cuts flat.
- Step 5: Balance Your Speed and Grit. Don’t force fine belts to chew through heavy slag. Keep feed speeds matched to abrasive rotation, and never skip more than two grit sizes in a row (like jumping from 60 straight to 240).
- Step 6: Change Just One Thing at a Time. Run a scrap plate, tweak a single setting—like lowering belt speed by 15%—and measure your surface again.
4. 6 Common Metal Finishing Defects and How to Solve Them on the Shop Floor
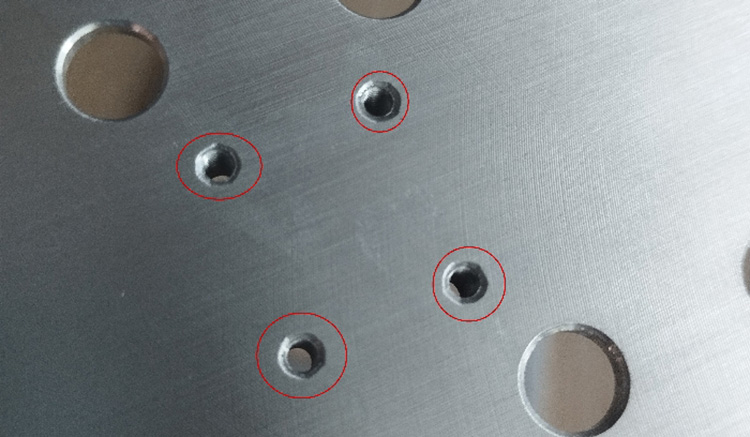
Chatter marks get the most blame, but other surface flaws ruin parts just as quickly. When quality inspectors flag your sheets, use these targeted floor fixes to track down the cause:
- Deep Straight Scratches: Long grooves running with the belt mean foreign grit, weld spatter, or a torn grain is trapped against the drum. Hit the emergency stop, inspect both sides of the belt, and clear debris with an air hose. If the backing is gouged, toss the belt before it ruins the next part.
- Blue Burn Marks and Warping: Rainbow heat stains or curled edges happen when dull grit rubs instead of shearing metal cleanly, driving temperatures past 500°C. Back off your cut depth by 0.05–0.10 mm, speed up the feed belt to reduce dwell time, and switch to self-sharpening ceramic abrasives for stubborn stainless.
- Solo Joint Imprints (Seam Slap): A single line that repeats at exact belt-length intervals means the splice is too thick or stiff. Switch to flush sine-wave butt joints taped with thin Kevlar, and always follow the directional arrow printed on the backing cloth.
- Uneven Thickness Across the Plate: If one side is bare steel while the other still has laser slag, your contact drum is sitting out of level with the conveyor bed. Dial-indicate both sides of the roller to within ±0.03 mm, and verify hold-down cylinders apply balanced downforce.
- Washboard Waves & Hesitation Steps: Wide ripples or sudden steps along the sheet mean the part is stalling under cutting pressure. Wipe oily residue off the conveyor bottom, tighten the feed drive chain, and check that your vacuum hold-down holds firm suction under load.
- Clogged, Glazed Belts: When grit pockets pack tight with shiny aluminum dust, the belt stops cutting and begins to smear. Run open-coat abrasives treated with cooling top-coats, and verify your dust collector pulls at least 25 m/s air velocity to strip swarf away before it melts.
5. How to Set Cut Depth, Feed Rate, and Belt Speed to Avoid Grinding Burns
A flawless, ripple-free finish comes down to balancing four levers: grit size, downforce, belt speed, and conveyor feed. Tweak them together, not apart:
- Step Your Grits Wisely: Never skip more than two grit sizes in a row (e.g., jump 60 to 100 to 180, not 60 straight to 220). Forcing fine grit to chew heavy slag glazes the belt, overheats the plate, and causes chatter. For tough carbon steel, choose self-sharpening ceramic minerals that stay sharp under load.
- Match Belt Speed to Feed: If the drum skates over the metal rather than cutting cleanly, ripples follow. Run carbon steel at moderate belt speeds (18–22 m/s) with a steady 1.5–3.0 m/min feed to clear chips. For clean stainless graining (No. 4/hairline), spin faster (24–30 m/s) to pull crisp, continuous lines without heat spots.
- Know When Dry Grinding Hits Its Limit: Thin sheets (<3.0mm) drink up friction heat fast, bowing right up into the grinding head to leave nasty burns. Plus, dry aluminum dust clogs belts fast and brings serious combustible dust risks.
When thermal warping or sticky swarf stops your line, standardizing on an automated wet deburring machine flushes away heat, washes out swarf, and keeps thin plates dead flat.
If your crew spends more time checking roller wobble, chasing belt tracking, and hand-sanding rejected parts than actually running production, you haven’t got bad operators—you’ve hit the physical limits of an aging machine.
Lightweight frames flex under heavy cuts, and manual handwheels leave your finish to pure guesswork. Watch for these red flags:
- Chatter that won’t quit: Ripples remain even after mounting balanced drums and fresh belts, proving the frame itself is flexing.
- Shift-to-shift drift: Surface quality changes the moment an experienced operator walks away.
- Burning through belts: Glazed abrasives and thermal dishing inflate your shop’s monthly consumable bills.
- Mixed-gauge headaches: Switching from 1.0 mm laser cutouts to 20 mm plate demands hours of tedious setup.
When troubleshooting turns into daily firefighting, it’s time to upgrade. A modern sheet metal deburring machine built on a heavy cast-iron base absorbs vibration at the source. Paired with pneumatic floating heads, a high-suction vacuum bed for small parts, and closed-loop wet cooling to stop heat warping, it turns frustrating guesswork into repeatable, push-button consistency every single shift.
Conclusion:
Surface ripples and heat warping shouldn’t eat away your profits. Most floor issues come down to simple roller runout or speed mismatch—but when thin sheets warp or aging frames flex, endless tinkering only burns shop time.
Stop guessing on your production line.
Send us your toughest laser-cut or stamped parts. We’ll run a free trial pass on our precision wide belt systems, deliver a certified Ra surface report, and dial in the exact parameters to lock in clean, repeatable edges.
Frequently Asked Questions (FAQ):
Q1: What causes chatter marks in wide belt metal grinding?
▼
Chatter marks are repetitive, transverse ripple lines caused by harmonic vibration entering the cutting zone. The most frequent mechanical root causes include worn contact roller bearings, rubber drum runout exceeding 0.02 mm, excessive abrasive belt joint thickness, and conveyor belt slippage under heavy downforce.
Q2:Why does my wide belt grinder leave deep longitudinal scratches?
▼
Continuous scratches running parallel to the feed direction are typically caused by foreign debris, weld spatter, or dislodged coarse abrasive grains trapped between the contact drum and belt backing. Insufficient exhaust air velocity or contaminated conveyor beds will also press metal swarf repeatedly into the sheet surface.
Q3:What causes grinding burn marks and blue discoloration on sheet metal?
▼
Grinding burn is caused by excessive localized friction heat (> 500℃), which alters the metal’s metallurgy and surface color. This occurs when operators apply too much downforce, use dull or glazed abrasive belts that rub rather than shear, or run dry grinding on heat-sensitive materials like thin stainless steel or titanium.
Q4:Why is my metal sheet thickness uneven after a grinding pass?
▼
Uneven stock removal across the width of a plate typically stems from an unparallel contact roller relative to the conveyor bed table. Other primary causes include uneven pneumatic pressure on hold-down pinch rollers or localized grooving wear down the center track of the feed conveyor belt.
Q5: How do I prevent abrasive belts from loading when grinding aluminum?
▼
Aluminum swarf is ductile and tends to melt into abrasive grit pockets under dry friction heat. To prevent belt loading, use open-coat silicon carbide or ceramic belts treated with anti-friction top-coat aids (like cryolite), maintain minimum dust extraction speeds of 25m/s, or switch to an automated wet deburring process with continuous flood filtration.
Q6: How can I improve batch-to-batch surface consistency in precision sheet finishing?
▼
To achieve repeatable surface roughness (Ra) values, standardize your abrasive grit sequence without skipping more than two grades, maintain roller total indicated runout (TIR) under 0.02mm, ensure consistent pneumatic belt tension, and utilize motorized through-feed systems equipped with vacuum hold-down beds.
Ready to elevate your production quality?
Investing in a high-quality sanding machine is a decision that impacts your manufacturing precision and efficiency for the next 5 to 10 years. Don’t settle for instability. Choose a reliable partner to secure your competitive edge in surface finishing.