
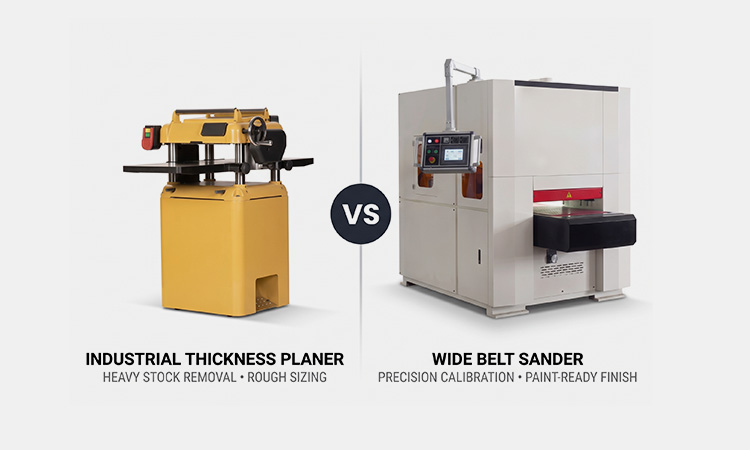
When choosing industrial woodworking equipment, a planer and a wide belt sander may appear to perform similar tasks, but they are designed for different stages of surface preparation. A planer is primarily used for rapid stock removal and thickness reduction, while a wide belt sander provides controlled material removal, calibration, and surface finishing.
Understanding these differences is important when processing solid wood, glued panels, MDF, plywood, and other wood products. The right machine depends on material thickness, required stock removal, surface quality, production volume, and finishing requirements.
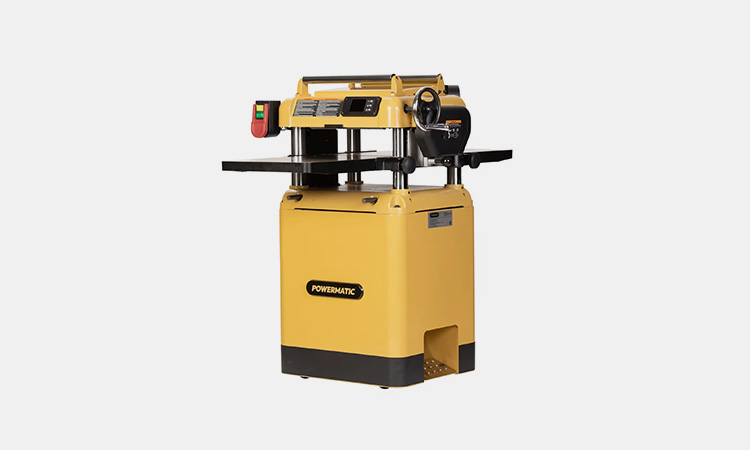
1. Industrial Thickness Planers: High-Volume Stock Removal & Sizing
Spinning heavy carbide knives at nearly 5,000 RPM, a solid planer simply powers through thick lumber, turning rough band-saw ridges into smooth piles of wood chips in a single pass.
Where Planers Win Big:
- Aggressive Bulk Cut Depth: A 10 to 25 HP workhorse can easily shave off 1/8″ to 1/4″ (up to 6 mm) in one go—saving your crew hours of repetitive passes.
- Pure Energy Efficiency: Slicing through wood with sharp rotating knives draws far less electrical power per board foot than grinding it away with sandpaper, while maintaining feed speeds up to 30 feet per minute.
The Costly Drawbacks:
- Tear-Out on Reversing Grain: Because planer blades spin upward, they naturally pry and lift wood fibers. So the knives will snatch and tear out chunks of wood instead of slicing them clean.
- Trouble with Thin Stock: Planers rely on heavy steel rollers and intense downward pressure bars to hold boards flat against the bed. Try feeding stock thinner than 1/8″ (3 mm), and it will chatter, splinter, or jam under the cutterhead.
2. Industrial Wide Belt Sanders: Flawless Finishing and What You Can’t Force
While a planer uses muscle, an industrial wide belt sander is all about finesse. Running a massive continuous sanding belt over heavy rollers and a cushioned pad, they glide back and forth to give you a glass-smooth, perfectly flat finish.

Why Every Finish Shop Loves a Wide Belt:
- Zero Tear-Out on Tricky Grain: Sandpaper micro-scratches the surface instead of lifting wood fibers. Whether you are running wild burl, end-grain butcher blocks, or multi-directional glued panels, you will never see tear-out or splintered corners.
- Dead-On Thickness Control: With precision digital readouts and heavy-duty table jacks, you can dial in your finished thickness down to the thickness of a sheet of paper (± 0.005″), keeping wide panels flat and parallel from edge to edge.
- Ready for the Spray Booth: By combining a hard drum for flattening with a soft finishing pad for polishing, you can achieve the surface consistency of a dedicated wood polishing machine, stepping straight from rough leveling to 180-grit stain-ready boards in just a couple of passes.
The Bottlenecks to Watch Out For:
- You Can Only Take Off a Sliver: A wide belt sander is not built for micro-calibration, not heavy leveling. It is limited to a maximum depth of cut between 0.2 mm and 0.5 mm per pass. If an operator gets impatient and tries to take off a full millimeter, the main motor will spike into the red and stall out.
- Belt-Killing Heat and Melted Glue: Push the machine too hard, and the friction heat instantly melts wood sap and cured glue lines. That goo glazes over the abrasive grit, leaving black burn streaks across your nice timber and ruining an expensive belt in seconds.
3. The Real Operating Costs: Planer Knives vs. Sanding Belts
Looking only at machine price tags hides the real budget killer in a busy shop: everyday running costs. Wasted wood, replacement tooling, downtime, and high power bills add up fast on your balance sheet.
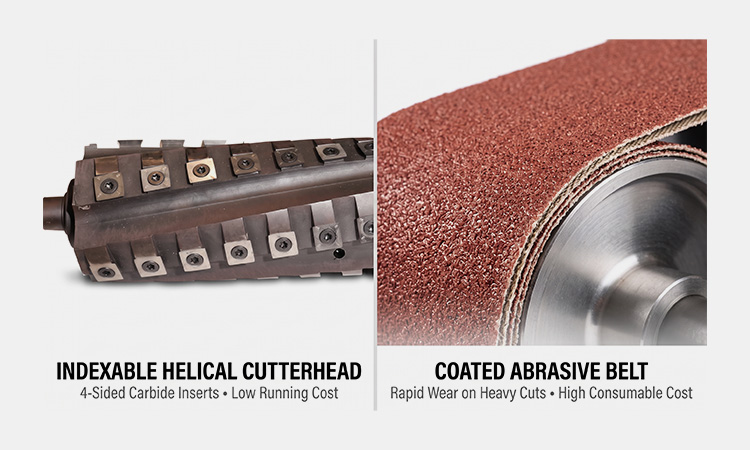
Why Carbide Cutterheads Save Real Money:
- Four Edges per Insert: Modern helical heads use 4-sided carbide inserts. When an edge dulls, loosen the screw, turn it 90°, and keep running. No expensive off-site blade grinding required.
- Minute Fixes: Hit a hidden nail or hard knot with a traditional straight blade, and you ruin the whole knife. With a helical head, you rotate only the nicked insert and get back to work in minutes.
Why Sanding Off Heavy Stock Burns Cash:
- Heavy Belts Are Costly: Wide industrial belts are expensive consumables.
- Rapid Belt Wear: Using coarse 40- or 60-grit belts to hog off 2 mm of rough stock tears up grit and glazes belts in just a couple of shifts.
- The Smart Strategy: Belts pay off when reserved for light touch-ups (under 0.5 mm) and final polishing, where a single belt lasts for thousands of feet.
4. Planer vs. Wide Belt Sander: Which Machine Does What Best?
To streamline capital planning and evaluate floor performance, the fundamental mechanical and operational differences between standalone industrial planers and wide belt sanders are summarized below:
| Industrial Thickness Planer | Wide Belt Sander | Planer-Sander Combo (Hybrid) | |
| Primary Action | Rotary cutting with carbide insert knives | Abrasive shearing via high-speed belts | Rotary hogging followed by 2-stage abrasive sanding |
| Max. Cut Depth / Pass | 1.5 mm – 6.35 mm (1/4″) | 0.2 mm – 0.5 mm (0.008″ – 0.020″) | 2.0 mm – 5.0 mm total stock reduction in one pass |
| Typical Feed Speeds | 16 – 30 FPM (5 – 9 m/min) | 7 – 68 FPM (variable gear/inverter) | 0 – 18 m/min (variable inverter drive) |
| Surface Finish (Ra / Grit) | Scalloped knife marks (requires sanding) | 60 to 220+ grit paint-ready finish | 150 to 180+ grit sealer/stain ready |
| Cross-Grain / Knot Risk | High risk of fiber tear-out and chipping | Zero tear-out; safe across grain transitions | Minimal tear-out (shear cut followed by abrasive erase) |
| Board End Snipe | Common (0.002″ to 0.010″ dip on board ends) | Negligible (controlled by rubber pressure rollers) | Eradicated via continuous multi-stage feed shoe pressure |
| Minimum Stock Gauge | 3.175 mm (1/8″) | 2.0 mm to 3.0 mm (thin veneer capable) | 2.0 mm (0.080″) |
| Hardened Glue Lines | Cuts cleanly through PVA/polyurethane glue seams | Causes rapid abrasive loading and burn streaks | Cutterhead shears glue; sanding heads polish wood clean |
| Tooling Maintenance | Rotate individual 4-sided carbide inserts | Regular belt cleaning, replacement, and platen re-facing | Extended insert longevity + reduced abrasive wear |
| Dust Collection Demands | Moderate (900 – 1,200 CFM for large chips) | High (1,800 – 3,600+ CFM for micro-dust) | High (multi-manifold zoned evacuation ports) |
| Floor Space & Labor | Dedicated cell; requires manual off-stacking | Dedicated cell; requires separate material staging | Single integrated footprint; single operator infeed/outfeed |
When working with wide glued panels, butcher blocks, or architectural slabs, choosing the right panel sander configuration determines whether your line flows smoothly or bottlenecks at the transfer carts
5. The All-in-One Solution: Heavy Planing and Precision Sanding in a Single Pass
Running a separate planer and sander wastes floor space, eats up payroll, and creates a constant bottleneck of workers dragging carts between machines.
Our wide belt sander combines heavy wood removal and fine finishing into one solid chassis (available in 630 mm, 1000 mm, and 1300 mm widths). Your timber goes in rough and comes out paint-ready in a single pass through three built-in stations:
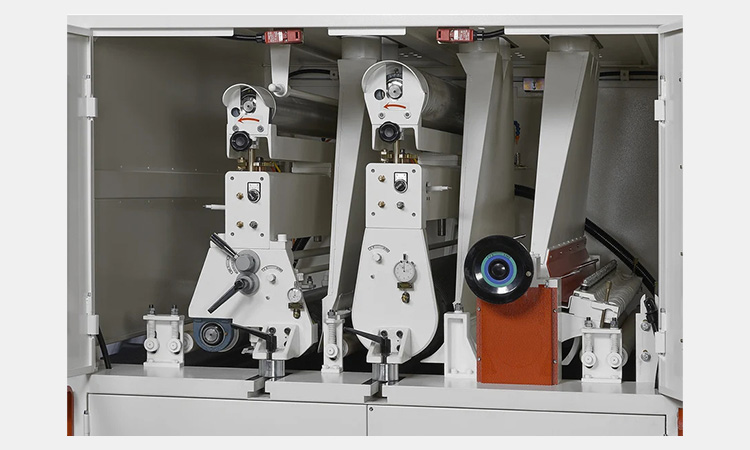
Station 1: Heavy Roughing (Helical Cutterhead)
A massive helical cutterhead armed with 4-sided carbide inserts chews off 2.0 mm to 5.0 mm of rough stock in one go. It levels cupped panels and slices right through rock-hard glue seams without tear-out.
Station 2: Erasing Knife Marks (Solid Steel Roller)
Right behind the blades, a rigid steel contact roller running an 80- to 100-grit belt grinds away the rotary knife ripples, locking in dead-flat, uniform thickness across the entire board.
Station 3: Paint-Ready Polishing (Rubber Roller & Platen)
The final head pairs a cushioned rubber roller with an adjustable graphite platen running 120- to 180-grit paper. It buffs away loose wood fibers and chatter, giving you a glass-smooth, stain-ready finish.
Smart Control, Real Shop Savings
A simple Delta touchscreen lets your operator dial in exact target thicknesses in seconds, while the variable feed drive (up to 18 m/min) adjusts smoothly to any wood species. You cut handling labor in half, free up valuable floor space, and walk away with finished panels straight off the outfeed table.
Conclusion
Planing and sanding are not competitors—they are partners. Planers give you the brute power to hog off rough wood cheaply, while wide belt sanders deliver that smooth, paint-ready surface. Not sure what configuration fits your timber best? Send us your wood for live testing, and get your real data back with a full report and precise thickness readings. Talk directly with our engineers to dial in the right cutterhead, rubber roller hardness, and sanding platens for your daily output.
FAQ
Q1: Can a wide belt sander completely replace a thickness planer for leveling glued edge solid wood panels?
▼
Technically, you can—but your wallet will take a heavy hit.
Even with a coarse 40- or 60-grit belt on a solid steel drum, asking a sander to chew off more than 0.5 mm in one pass pushes the motor to its limit. Grinding down rough hardwood panels and cured glue seams quickly glazes over your belts, loads the grit with resin, and spikes your power bill.
It makes far more financial sense to let rotating carbide knives handle the heavy leveling first, then bring in the wide belt strictly for that final, glass-smooth calibration—or run them back-to-back in a single pass on a planer-sander combo machine.
Q2: What causes “chatter” or washboard ripple marks on finished boards, and how do I determine if it is coming from the planer or the sander?
▼
Look closely at the marks on your board—the pattern tells you exactly which machine needs attention:
Evenly Spaced Ridges (Look at the Planer):
If the board shows distinct, evenly spaced horizontal waves, that is classic knife chatter. Check for dull blades, unbalanced cutterhead rotation, incorrect feed roller pressure, or loose bed guides.
Fine, Irregular Washboards (Look at the Sander):
If the ripples are tightly grouped and irregular, your sander is bouncing. The usual culprits are a bad belt splice seam, an out-of-round rubber roller, or a worn-out graphite pad.
Straight Grooves Running End-to-End:
If the marks run lengthwise with the board rather than across it, a trapped scrap of metal or debris has grooved your contact roller or pressure shoes. It is time to dress and true up the rollers.
Q3:How do I adjust my wide belt sander’s platen to prevent rounded leading and trailing edges on panels?
▼
Rounded edges (or “dubbing”) happen when the flexible sanding belt dips and wraps around the leading or trailing corners of your board.
Fixing it comes down to two quick adjustments:
Watch Your Platen Depth: When dropping the graphite pad for your final pass, keep it shallow—never set it more than 0.2 mm to 0.5 mm below the contact drum. If you are doing rough leveling, dial the pad flush with or slightly above the bottom edge of the roller.
Lock Down Infeed and Outfeed Rollers: Make sure your steel hold-down shoes and pressure rollers are adjusted dead-parallel to the conveyor bed. If a panel lifts or flexes as it enters or leaves the head, the belt will gouge that leading corner every time.
Q4:Why does our wide belt sander constantly trip the emergency limit switch and stop during operation?
▼
When your sander trips the limit switch and abruptly shuts down, the belt’s left-to-right tracking system has lost its rhythm. The belt drifts too far sideways, and the safety switch cuts power to protect your cabinet from being shredded.
Check these three common trouble spots before calling a tech:
- Clean the Sensors First: Fine sawdust often coats the photo-eye reflector or clogs the air-jet tracking fork. A quick blast with an air gun clears the beam so the tracking cylinder knows when to reverse.
- Check Your Shop Air Pressure: Tracking cylinders need steady muscle. If your incoming line pressure drops below 75 PSI (5.5 bar), the cylinder moves too slowly to catch a drifting belt in time.
- Inspect the Sanding Belt: A belt with a frayed edge, moisture stretching on one side, or an uneven factory splice will wobble erratically across the rollers. Swap in a fresh belt and check if tracking stabilizes.
Q5:What is the optimal sequence of abrasive grits when transitioning from a rough-planed surface to a paint-grade finish?
▼
The golden rule of sanding is simple: never skip more than one grit size (or about 50 grit points) in a single jump. If you jump too far, the fine grit will glaze over without removing the deep scratches underneath.
A good helical cutterhead leaves a surface roughly equal to 80-grit. From there, use this proven 3-step sequence:
Pass 1: Erase Knife Marks (80 to 100 Grit)
Run a solid steel drum or hard rubber roller. This levels the board and grinds away all planer ripples.
Pass 2: Smooth the Scratches (120 to 150 Grit)
Switch to a medium-rubber roller to soften the surface and step down the rough grit lines.
Pass 3: Paint-Ready Finish (180 to 220 Grit)
Finish over a cushioned graphite platen. It acts like an iron, flattening loose wood fibers so stain and primer go on without revealing hidden scratches. (For intermediate finish coats on painted lines, run a dedicated lacquer sanding machine to avoid sanding through primers.)
Ready to elevate your production quality?
Investing in a high-quality sanding machine is a decision that impacts your manufacturing precision and efficiency for the next 5 to 10 years. Don’t settle for instability. Choose a reliable partner to secure your competitive edge in surface finishing.