
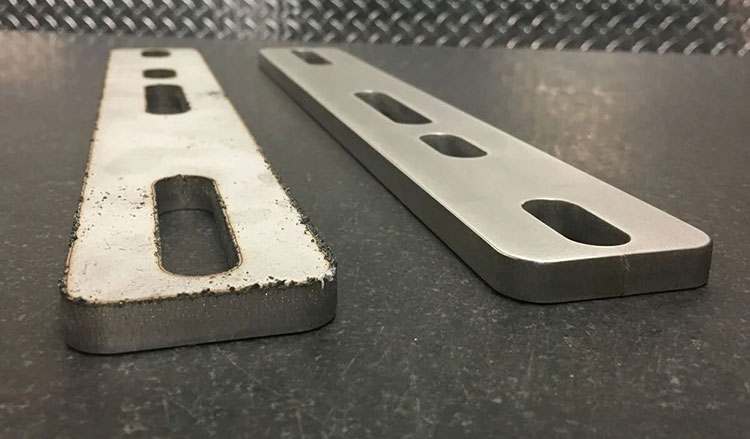
In sheet metal fabrication, parts rarely leave the laser cutter or stamping press ready for delivery. Dross, sharp perimeter burrs, and mill scale create dangerous handling hazards and compromise downstream coating adhesion.
Surface finishing bridges the vital gap between raw shaped blanks and precision finished assemblies. From knocking down heavy plasma dross to pulling a consistent No. 4 brushed finish across stainless sheets, selecting the right finishing sequence protects your margins.
This engineering guide breaks down the core mechanical, chemical, and coating processes to help you specify the right finish and streamline your production line.
1. What Is Metal Surface Finishing?
Metal surface finishing is the post-fabrication stage that prepares raw metal for real-world service. Rather than altering a part’s core dimensions, it directly refines the outer surface and edges—transforming rough cut blanks into safe, durable, and functional components.
Engineering drawings often mix up surface finishing and surface treatment, but on the shop floor, it’s simple: surface finishing handles the mechanical shape—like knocking off burrs and rounding sharp edges. Surface treatment adds chemical defense—like paint, powder coat, or rust proofing. To get a part ready for the real world, you almost always need both.
Leaving parts without treatment will leave you:
- Assembly & Tooling Damage: Laser dross and punch burrs throw off backgauge seating in press brakes, wear out bending dies, and create severe handling hazards.
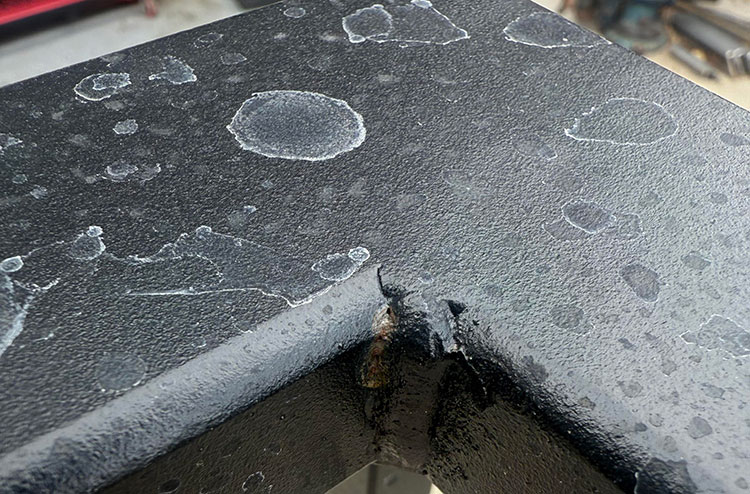
- Premature Paint Failure: Liquid paints and powder coatings naturally pull away from razor-sharp 90° corners due to surface tension. Breaking these corners to a uniform radius is essential to stop edge corrosion.
- Coating Peeling: Primer applied over thermal oxide skins or mill scale simply flakes off under stress.
Whether through abrasive deburring, edge radiusing, or directional graining, mechanical surface finishing establishes the baseline quality required for reliable assembly and long-lasting coatings.
2. What Are the Main Metal Surface Finishing Methods?
Industrial finishing methods fall into five distinct categories based on how they alter the part:
| Common Processes | Primary Role | Typical Applications | |
|---|---|---|---|
| Mechanical | Deburring, edge rounding, grinding, graining, polishing | Physical dimensioning, burr removal, edge radiusing, cosmetic texture | Laser-cut blanks, punched sheet metal, structural plates |
| Chemical | Pickling, passivation, etching, conversion coating | Scale removal, micro-cleaning, baseline corrosion defense | Welded stainless frames, aluminum pre-treatment |
| Electrochemical | Electropolishing, electroplating (zinc, chrome) | Micro-level leveling, decorative shine, sacrificial protection | Sanitary hardware, medical parts, threaded fasteners |
| Coating | Powder coating, industrial wet spray, e-coating | Environmental barrier, UV resistance, cosmetic color | Electrical enclosures, chassis, heavy machinery |
| Thermal | Induction hardening, nitriding, carburizing | Case hardening, wear and fatigue resistance | High-friction gears, drive shafts, stamping dies |
For you, mechanical finishing is where the workflow starts. Abrasive belts, rotary brushes, and cross-belts physically strip cutting slag, knock off burrs, and radius razor-sharp corners—giving you immediate dimensional control without hazardous chemicals.
3. Mechanical Metal Surface Finishing Processes
Cutting gives a part its shape, but mechanical finishing makes it safe, usable, and paint-ready. Instead of wearing out your crew with noisy angle grinders, automated machines run parts through four practical steps in a single conveyor pass:
Step 1: Heavy Cleaning (Slag & Oxide Removal)
Before belts even touch the metal, tough pins and cross-belts shatter thick plasma dross and strip away brittle laser oxide skin so downline abrasives don’t tear.
Step 2: Burr Knockdown (Deburring & Grinding)
A wide-belt contact drum grinds vertical cut flash completely flush with the plate, preventing sheet jams in CNC press brakes and keeping assembly hands safe.
Step 3: Edge Radiusing (Edge Rounding)
Spinning rotary brushes reach around outer edges and internal cutouts, softening sharp 90° corners into a clean 0.5- 2.0 mm radius.
Step 4: Surface Refinement (Sanding & Graining)
Fine-grit belts and soft wheels blend out weld marks, lower surface roughness ($Ra$), or pull straight, clean cosmetic lines across the sheet.
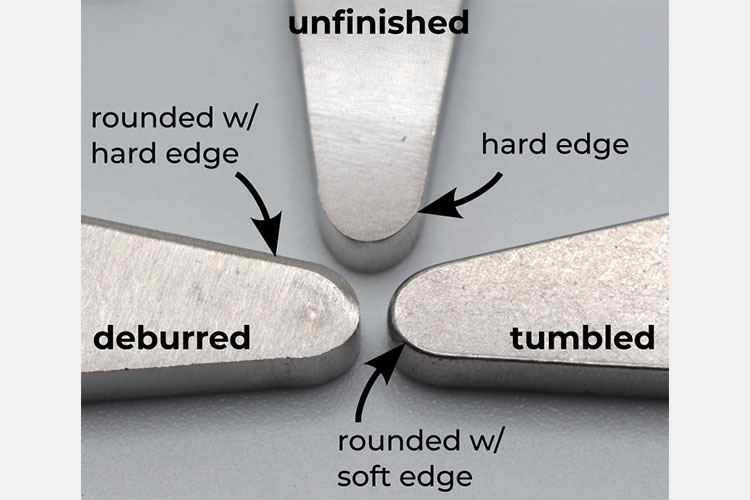
Deburring vs. Edge Rounding: A standard sanding belt only knocks down upright vertical flash—leaving a razor-sharp edge behind. Flexible spinning brushes wrap around the corners to give you an intentional radius. That small curve is what keeps powder coat from pulling thin and rusting down the road.
4. Types of Metal Surface Finishes
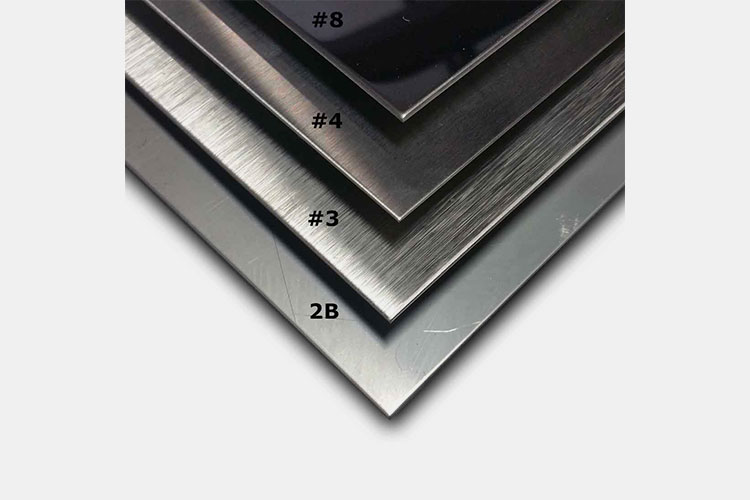
Choosing the right metal surface finish determines how a part looks, feels, hides daily handling marks, and bonds with downstream coatings. Selecting the right finish balances cosmetic expectations against manufacturing cost:
| Appearance & Texture | Typical Process | Target Roughness(Ra) | Best Used For | |
| Mill Finish | Raw, dull gray, uneven scale or die tracks | As-supplied from rolling/extrusion | 1.6-6.3 um | Hidden structural frames, unexposed brackets |
| Brushed | Fine, soft directional lines; muted satin luster | Wire wheels, non-woven Scotch-Brite drums | 0.4-1.2 µm | Control cabinets, appliances; hides fingerprints |
| Satin | Silky, diffuse, low-gloss without harsh glare | Fine belts on cushioned platens | 0.2-0.8 µm | Architectural trim, medical hardware |
| Polished | Highly reflective, mirror or sanitary sheen | Multi-stage buffing or electropolishing | < 0.1- 0.2 µm | Food hoppers, pharmaceutical tanks, cleanrooms |
| Grained | Sharp, continuous, deep linear scratches | Wide-belt graining machines (80-180 grit) | 0.8-1.6 µm | Elevator cars, stainless steel facades |
| Matte / Bead-Blasted | Diffuse, non-directional, glare-free texture | Media blasting, chemical etching | 1.0-3.2 µm | Instrument panels, heavy coating, mechanical anchor |
5. Metal Surface Finishing for Different Materials
What works on structural carbon steel will ruin soft aluminum or work-harden stainless. Matching your abrasive and machine kinematics to the substrate’s metallurgy protects parts from distortion and scrap:
| Shop Floor Challenge | Best Abrasive & Process Choice | Dedicated Machine Setup | |
| Stainless Steel | Work-hardens quickly under heat; susceptible to rust if contaminated with carbon iron particles. | Iron-free ceramic or aluminum oxide belts; steady, moderate feed to stop heat tint. | Stainless Steel Deburring Machine |
| Aluminum | Low melting point causes belt loading (capping); soft edges roll over instead of shearing cleanly. | Open-coat silicon carbide or stearate-coated belts; soft top brushes for edge radiusing. | Aluminum Deburring Machine |
| Carbon Steel | Brittle mill scale and heavy, hardened thermal dross from plasma/torch cutting. | Heavy mechanical chipping pins followed by coarse 36–60 grit zirconia contact drums. | Steel Deburring Machine |
| Copper & Brass | Highly malleable and easily gouged; stamped burrs risk high-voltage arcing in electrical busbars. | Use fine non-woven Scotch-Brite or soft rotary nylon brushes to preserve nominal thickness. | Copper Deburring Machine |
Two Critical Rules:
Cross-Contamination: Never run stainless steel through an abrasive belt previously used for carbon steel. Because the embedded carbon particles destroy the stainless chromium oxide layer, causing sudden rust spots.
6. Sheet Metal Surface Finishing
Thin sheet parts have high surface-to-thickness ratios, making them prone to heat warping, edge breakout burrs, and premature coating failure. Unlike solid billet machining, finishing sheet metal focuses on three tightly linked post-cutting tasks:
| Cutting / Forming Method | Shop-Floor Edge Defect | Downstream Risk | Machine Solution |
|---|---|---|---|
| Laser (Oxygen-Assisted) | Brittle, glassy iron-oxide edge skin and dross droplets. | Paint adheres only to the oxide film, peeling off in the field. | Laser Oxide Removal via wire edge-descaling brushes. |
| Laser (Nitrogen-Assisted) | Clean faces, but fine vertical dross whiskers along bottom kerf. | Cuts operator’s hands; misaligns parts in CNC bending stops. | High-speed wide abrasive belt on a deburring machine |
| Turret Punching / Stamping | Downward breakout burrs, jagged tear flash, nibbling step-marks. | Scratches adjacent sheets in transit; jams automated welding jigs. | Contact roller passes on a sheet metal deburring machine |
Deburring vs. Edge Rounding for Coating
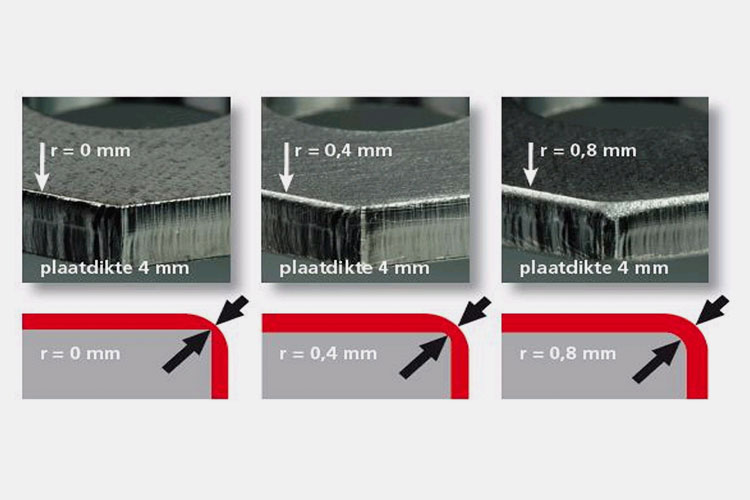
A contact belt only eliminates the vertical burr, leaving an untreated, razor-sharp 90° perimeter. During curing, liquid paints and powder coats naturally pull away from sharp corners due to surface tension—reducing an 80 µm flat coat down to less than 10 µm right at the edge. Passing blanks through an edge-rounding machine creates a calibrated 0.5- 2.0 mm radius along all internal cutouts and contours, securing uniform paint thickness to meet ISO 12944 corrosion standards.
7. How to Choose the Right Metal Surface Finishing Method
Selecting the correct finishing method is an engineering trade-off: over-processing wastes cycle time and distorts thin sheet, while under-processing leads to chipped coatings and customer rejections.
Evaluate your application through a practical four-step workflow:
Target Spec ➔ Starting Condition ➔ Batch Volume ➔ Automation Level
Define the End Spec First
Are parts heading to powder coat (requiring a 0.5- 2.0 mm edge radius for paint adhesion), cleanroom service (Ra < 0.4 µm ), or cosmetic display (No. 4 linear grain)?
Match Entry Condition to Tooling
Shatter heavy plasma slag with deslagging pins first, grind punch/laser burrs flush with wide abrasive belts, or strip oxygen-cut laser edges with wire descaling brushes.
Evaluate Volume & Labor Limits
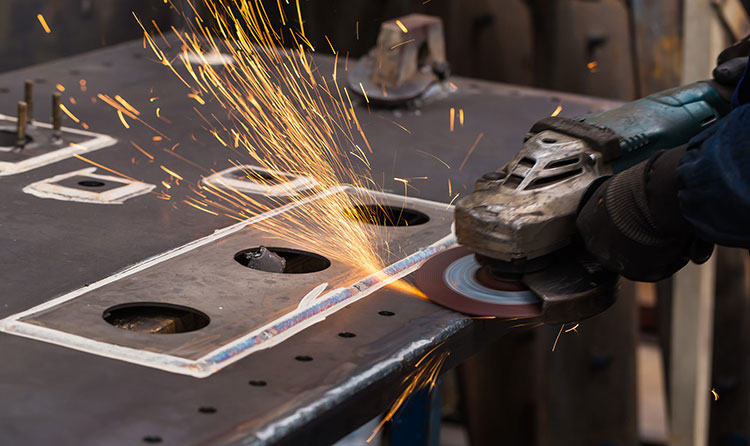
Hand grinders remain viable for low-volume prototypes, but automated flow-through machines become necessary when secondary finishing bottlenecks your laser cutters.
| Manual Hand Tools (Grinders / Pads) | Automated Surface Finishing Machine | |
|---|---|---|
| Feed Throughput | 1 to 3 parts/min; slows down as operators tire | 2 to 10+ m/min continuous conveyor feed |
| Edge & Radius Consistency | Operator-dependent; prone to edge beveling and gouges | Uniform 360° radial break (0.5 mm repeatability) |
| Operating Labor Cost | High; requires multiple full-time grinding operators | Minimal; one operator feeds and unloads |
| Downstream Coating Pass Rate | Frequent edge flaking and salt-spray failures | Meets strict EN 1090 / ISO 12944 paint specs |
8. How Is Metal Surface Finish Measured?
How Is Metal Surface Finish Measured?
You can’t just “eyeball” a metal finish or judge it by feel. If you’re building parts for hydraulic seals, sliding brackets, or high-end powder coating, quality managers expect hard numbers to prove the surface will hold up.
Ra vs. Rz: What Really Matters in the Shop
- Ra (The General Average): Think of Ra as the overall smoothness score. It gives a quick, reliable snapshot of a flat sheet, but it has a blind spot: it averages everything out. A mostly smooth panel with one deep scratch can still pass an $Ra$ test.
- Rz (The Extreme Peaks & Valleys): This measures the distance between the highest peak and the lowest valley. For leak-proof seals or rust prevention, $Rz$ is the number to watch. That single hidden gouge missed by $Ra$ is exactly where an O-ring leaks or rust starts creeping under your paint.
Two Practical Ways to Check Your Parts
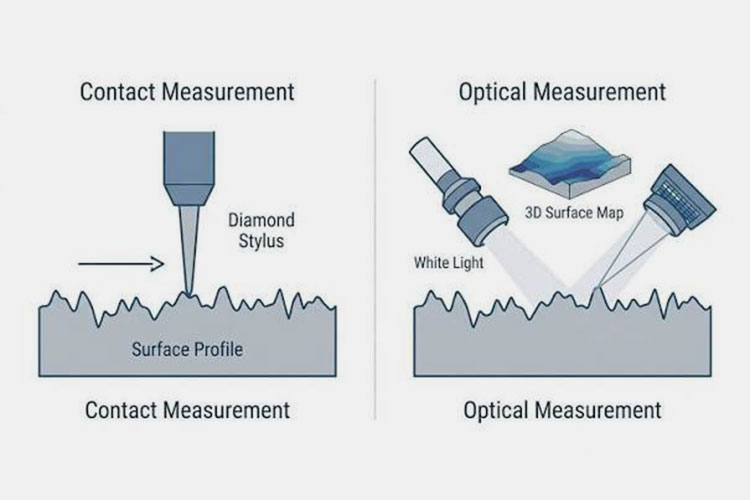
- Stylus Profilometers: A precision diamond-tipped pen glides across the metal (always run it across the grain, not with it) to give you an instant, digital roughness readout.
- Scratch Comparison Plates: Pocket-sized reference blocks kept right by the machine. Operators simply run a fingernail across the sample and the part for a fast, reliable benchmark before running a full batch.
Blueprint Tip: Watch for the check-mark symbol on customer drawings. A small bar across the top means grinding or sanding is required, and the number next to it sets your roughness ceiling (like max 1.6 um Ra).
9. How to Improve Metal Surface Finish?
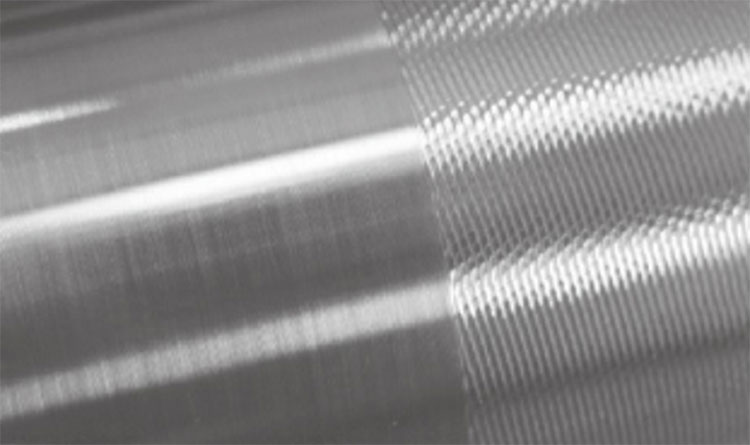
Getting a flawless metal finish isn’t luck—it’s about machine setup, grit steps, and steady feed pressure. When parts fail inspection, look for these five common culprits on the shop floor:
- Rough Surface (Ra out of spec): You likely skipped a grit step. You can’t jump straight from 60 grit to 220 grit. Finer belts just float over deep grooves. Move systematically (e.g., 80 ➔ 120 ➔ 180).
- Random Deep Gouges (“Wild Scratches”): Trapped metal debris or a torn belt seam. Blow off the conveyor bed, inspect belt edges for fraying, and clear out dust hoods.
- Wavy Chatter Marks: An unbalanced contact drum, worn-out bearings, or a cheap belt joint. Balance the drums and switch to seamless or bias-lap spliced belts.
- Paint Flaking at Edges: Powder coat peeling off means sharp $90^\circ$ corners or leftover laser oxide. Use rotary brushes to hit a minimum $0.5\text{–}1.0\text{ mm}$ edge radius and descale cut edges.
- Dark Burn Marks & Clogged Belts: Too much down-pressure or grinding soft aluminum dry. Back off the pressure and use open-coat silicon carbide belts with anti-loading coating.
10. When Should You Use a Metal Surface Finishing Machine?
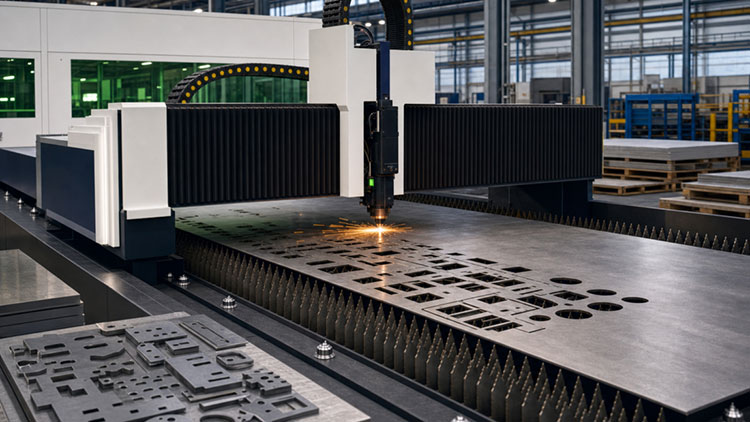
Hand grinders are fine for quick one-off fixes. But when manual grinding starts holding back your entire shop, those hand tools end up costing you serious money.
It’s time to look at an automated surface finishing machine when your shop hits these everyday bottlenecks:
- The Laser Traffic Jam: Your cutters run at full speed, but parts sit in piles waiting on someone with a grinder. Secondary finishing has become your shop’s biggest headache.
- The 4 PM Quality Drop: Parts finished at 8 AM look great, but parts ground near shift’s end get rejected because hands get tired and burrs get missed.
- Hiring Headaches: Grinding is dirty, loud, and exhausting. Reliable operators are hard to find and harder to keep. One machine easily does the work of four to six manual stations.
- Bending & Paint Troubles: A tiny leftover burr throws off your press brake angles, while sharp corners make powder coat peel right off.
- Visible Swirl Marks: Customers won’t accept random orbital scratches on visible panels. Clean, uniform lines require steady machine pressure.
11. Metal Surface Finishing Machines for Industrial Applications
Think of modern finishing machines like industrial building blocks. Instead of moving parts from one station to another, a single machine combines different heads to deburr, edge-round, and finish your metal in one quick conveyor pass.
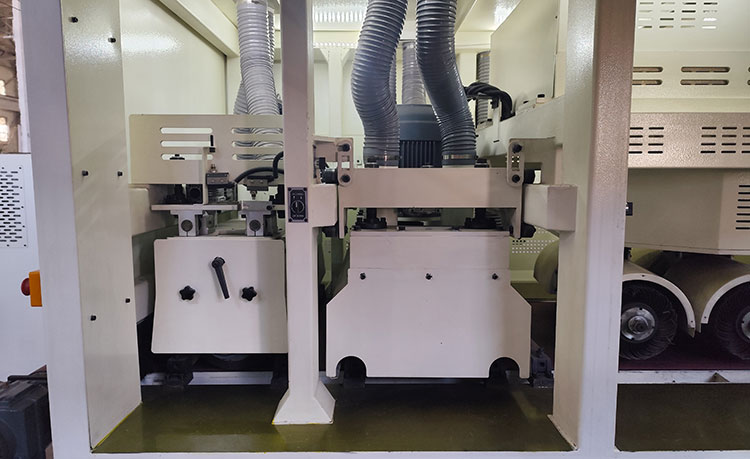
The Main Heads Inside the Machine
- Sanding Drum (R): A high-speed belt roller that grinds flat to knock off upright laser dross and punch burrs.
- Rotary Brushes (B): Spinning disc brushes that sweep 360° over every edge, hole, and slot to round sharp corners so paint won’t chip.
- Finishing Pad (P): A cushioned platen that floats over the belt to wipe out roller marks and leave a smooth, paint-ready surface.
- Slag Pins & Cross-Belts: Tough steel pins and side-sweeping belts built to smash off heavy plasma slag and strip glassy laser oxide.
Three Popular Setups for the Shop Floor
Drum + Brush (R+B): The go-to daily setup for laser job shops. It deburrs and rounds every edge in one run.
Double Drum + Pad (R+R+P): Best for flattening weld seams and pulling clean, streak-free cosmetic finishes.
Slag Head + Cross-Belt: Built for heavy plate shops to knock down thick torch slag and prep bare steel for primer.
12. How to Select a Metal Surface Finishing Machine?
Buying a machine comes down to one thing: matching the equipment to the parts you cut every single day. You don’t want to pay for features you’ll never touch, or end up with a bed that can’t handle your daily mix.
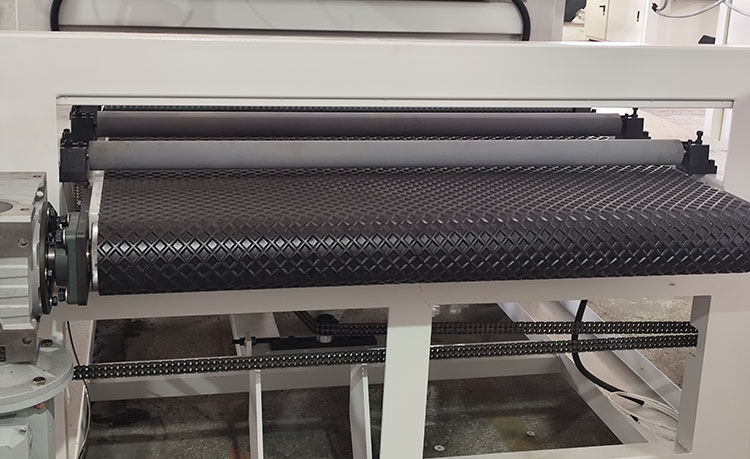
Here are four simple things to check before you invest:
- Conveyor Size & Small Parts: Standard widths run 600 mm, 1000 mm, or 1300 mm. If you run small brackets (under 100*100 mm), make sure to add a vacuum or magnetic bed so parts don’t kick loose while grinding.
- Daily Output: A simple two-head machine easily handles everyday job-shop runs. If you run small parts (under 50mm), make sure to add a vacuum or magnetic bed; step up to a faster multi-head line that keeps moving at 5 to 10 +m/min.
- Quick Job Changes: Switching between different sheet thicknesses all day? Look for a simple touchscreen with automatic thickness setup so your crew isn’t stuck hand-cranking rollers between batches.
- Air & Dust Prep: Ensure your plant has solid shop air (over 6 bar) for belt tracking, and always budget for a wet-dust collector if you grind aluminum.
Conclusion
A fast laser cutter doesn’t help much if parts get stuck in your grinding bay. Manual deburring is tough on your crew, slows down shipments, and leads to costly paint peeling down the road.
An automated finishing machine fixes that—turning a dirty, slow chore into a quick, one-pass job. Ready to clear your shop floor’s biggest bottleneck? Send a few of your trickiest test parts to ARMPRE. We’ll run them on our machines and show you the exact finish, edge radius, and setup that works best for you.
FAQ
Q1: What are the most common mechanical finishing steps for sheet metal?
▼
Most sheet metal parts go through a simple three-step progression: knocking down cut burrs with a sanding belt, breaking sharp 90°perimeters with rotating brushes (edge rounding), and pulling an even scratch pattern or linear grain with a fine-grit belt.
Q2: What is the best way to finish laser-cut parts?
▼
It depends on your cutting assist gas. If you cut with oxygen, you need wire brushes to peel off the brittle black oxide skin before painting. If you cut with nitrogen, a standard drum-and-brush pass quickly knocks off micro-dross whiskers and rounds sharp edges in seconds.
Q3:How do you remove burrs without leaving knife-sharp edges?
▼
A flat sanding belt only grinds the vertical burr flush, leaving a razor-sharp corner. To soften the edge, run the part through rotating disc brushes. The flexible abrasive fingers sweep over every contour and hole to leave a smooth 0.5-2.0 mm radius.
Q4:When should a shop switch from hand grinders to an automated machine?
▼
The moment secondary grinding holds back your lasers, paint starts chipping off sharp corners, or you can’t find enough reliable crew to man the grinding bay. An automated machine lets one person outpace an entire manual finishing team.
Q5:What is the optimal sequence of abrasive grits when transitioning from a rough-planed surface to a paint-grade finish?
▼
The golden rule of sanding is simple: never skip more than one grit size (or about 50 grit points) in a single jump. If you jump too far, the fine grit will glaze over without removing the deep scratches underneath.
A good helical cutterhead leaves a surface roughly equal to 80-grit. From there, use this proven 3-step sequence:
Pass 1: Erase Knife Marks (80 to 100 Grit)
Run a solid steel drum or hard rubber roller. This levels the board and grinds away all planer ripples.
Pass 2: Smooth the Scratches (120 to 150 Grit)
Switch to a medium-rubber roller to soften the surface and step down the rough grit lines.
Pass 3: Paint-Ready Finish (180 to 220 Grit)
Finish over a cushioned graphite platen. It acts like an iron, flattening loose wood fibers so stain and primer go on without revealing hidden scratches. (For intermediate finish coats on painted lines, run a dedicated lacquer sanding machine to avoid sanding through primers.)
Ready to elevate your production quality?
Investing in a high-quality sanding machine is a decision that impacts your manufacturing precision and efficiency for the next 5 to 10 years. Don’t settle for instability. Choose a reliable partner to secure your competitive edge in surface finishing.